Art and Value - Martha Garcia - Sixth Grade
4/10/2020 | 58m 8sVideo has Closed Captions
Learn how to create an art value scale and draw a Mona Lisa-inspired art project.
In this lesoon students will create an art value scale and will draw a Mona Lisa-inspired art project. Created by NJTV in partnership with the NJEA and the NJ Department of Education, NJTV Learning Live remote learning classes are for grades 3-6, taught by NJ public school teachers. One-hour lessons include math, science, English language arts, social studies, physical education and more.
Problems playing video? | Closed Captioning Feedback
Problems playing video? | Closed Captioning Feedback
NJTV Learning Live is a local public television program presented by NJ PBS
Art and Value - Martha Garcia - Sixth Grade
4/10/2020 | 58m 8sVideo has Closed Captions
In this lesoon students will create an art value scale and will draw a Mona Lisa-inspired art project. Created by NJTV in partnership with the NJEA and the NJ Department of Education, NJTV Learning Live remote learning classes are for grades 3-6, taught by NJ public school teachers. One-hour lessons include math, science, English language arts, social studies, physical education and more.
Problems playing video? | Closed Captioning Feedback
How to Watch NJTV Learning Live
NJTV Learning Live is available to stream on pbs.org and the free PBS App, available on iPhone, Apple TV, Android TV, Android smartphones, Amazon Fire TV, Amazon Fire Tablet, Roku, Samsung Smart TV, LG TV, and Vizio.
Providing Support for PBS.org
Learn Moreabout PBS online sponsorshipMore from This Collection
NJTV Learning Live is a class for sixth graders taught by NJ public school teachers.
Food Makes You Move - Kyle Hering - Sixth Grade
Video has Closed Captions
We look at how nutrition and physical activity play a role in taking care of our bodies. (58m 44s)
DNA: Language of Life - Megan Graziano - Sixth Grade
Video has Closed Captions
Students will answer the questions: What is DNA? What does DNA look like? How is it made? (56m 49s)
Science is "Egg" Citing - Dr. Robin McLean
Video has Closed Captions
Students will learn about the cell membrane through demonstrations that use a chicken egg. (54m 36s)
Civil War: Other Factors - Pam Romanchuk - Sixth Grade
Video has Closed Captions
Students will learn about the "other" factors of the Civil War. (57m 57s)
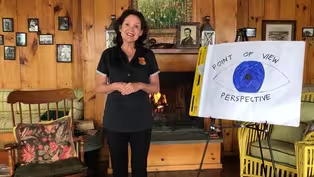
Try to See it My Way - Sally Booth - Sixth Grade
Video has Closed Captions
Students will learn about point of view and different perspectives in literature. (56m 11s)
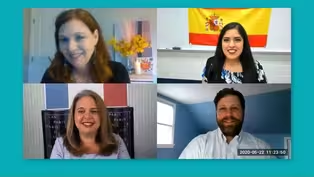
Acquiring a 2nd Language - Sanchez & Others - Sixth Grade
Video has Closed Captions
In this lesson, students will learn the benefits of acquiring a second language. (55m 31s)
Three Branches of US Government - J & K Brotz - Sixth Grade
Video has Closed Captions
In this lesson, students will learn about the three branches of the American government. (46m 45s)
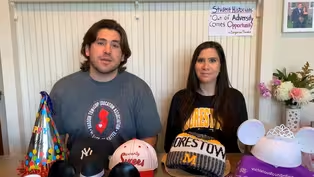
Crafting "I Survived" Stories - Vicki Sasso - Sixth Grade
Video has Closed Captions
Students will brainstorm, plan, and draft a story about surviving a historical event. (57m 16s)
Operating with Integers -Dr. Christopher Masullo-Sixth Grade
Video has Closed Captions
Students will learn how to add, subtract, multiply, divide, and simplify with integers. (56m 10s)
Intro to Public Speaking - Dr. Michael Gaskell - Sixth Grade
Video has Closed Captions
Students learn how to present in front of a group, whether in a classroom or remotely. (55m 19s)
Les Couleurs - Johadane Pierre-Davis - Sixth Grade
Video has Closed Captions
In this language lesson, students will learn all about the colorful world of French! (58m 55s)
Ecology and Water Conservation Tips - Dana Mason-Sixth Grade
Video has Closed Captions
Students will learn about ecology and water conservation by exploring sewer overflow. (56m 33s)
Providing Support for PBS.org
Learn Moreabout PBS online sponsorship>> Hi.
Welcome.
My name is Martha Garcia.
And before we get started, I'd like to tell you a little bit about myself.
I enjoy going to hockey games.
Let's go, Devils!
And I love eating sweets like chocolate and ice cream.
What are some of your interests or hobbies?
Okay.
Very cool.
How interesting.
Thank you for sharing.
I am an art teacher at Academy 1 Middle school in Jersey City, New Jersey, and today we are going to learn about the element of art value -- Standard 1.1, the creative process in the visual arts.
By the end of this episode, you'll be able to understand the value and the lightness or darkness of a color, And you'll be able to create your own value scale from light to dark, and, lastly, you'll be able to create overlapping hands to practice value in.
But before we jump into that, let me tell you why I love art.
One, art is in my first name, Martha.
M... Oh!
I mean...M. A-R-T -- H-A.
Martha.
Two, art makes me feel calm, and it makes me feel happy.
And, three, art can be found almost anywhere you go.
Where are some places you think we can find some art?
Okay, yes, buildings.
Definitely museums and galleries.
Around town?
Okay.
Yes.
Murals like in Jersey City.
In our clothing?
Definitely.
Do you think we can find some art in our homes?
Yeah, think about it.
While you're thinking about it, why don't we take a walking tour around my apartment and I'll show you some of the artwork I have?
Ready?
Let's go.
Are you guys excited to go on a tour of my apartment?
First stop is my library... where I have my bookshelf.
In the bookshelf, I have some books, some sketchbooks, colored pencils, a basket of art supplies, an old camera.
Back in the day, we had to develop our photographs and we didn't see them right away.
Just like these cameras right here.
Can you guys spot out a painting that's on my bookshelf?
If you said it was the Eiffel Tower painting next to the old cameras and the colored pencils right here, you're correct.
Ding, ding, ding!
Now, does anyone know where the Eiffel Tower is located?
If you said Paris, France, you are correct again.
Whoo-hoo!
Good job!
Above the bookshelf is a Colombian tapestry that was given to my mom by one of her coworkers.
Then my mom decided to give it to me for my apartment.
Thanks, Mom!
So, one of the things I love about this tapestry is how colorful it is.
Can you tell me how many kids are in this tapestry?
If you counted 7, you are...correct!
Congratulations again!
You guys are really good at this.
Close-up version... to see all the details of the stitching... the animals.
Incredible, right?
Okay.
We're going to skip my bedroom and move on to the bathroom.
You're probably thinking, why do I want to show you my bathroom?
Just wait and see.
All right.
Here we go.
♪ Bathroom, here we come ♪ ♪ Ba-dum-dum-dum ♪ And lights on.
This is why I wanted to show you my bathroom.
Okay.
Welcome to my bathroom.
One of the things I love about my bathroom is the wallpaper that I picked out.
This wallpaper is called "Almond Blossoms."
And the name of the artist that created and painted "Almond Blossoms" is Vincent Van Gogh.
How many of you have heard of the artist Vincent Van Gogh?
Okay, so some of you have heard of him through your art classes.
Some of you have read about him in books.
Good.
So you might be more familiar with his artwork "The Starry Night," which is located in New York City at the Museum of Modern Art, also known as MoMA.
One of the things I love about this wallpaper and the painting that he created is the texture.
I also give you a zoomed-in version so you can see the texture.
Technically, you're not supposed to be touching artwork, but since it's not the original piece and it is my bathroom, I sometimes love to run my hand through it to feel the texture.
You can see that.
And Vincent Van Gogh was inspired to do this painting -- it was one of his favorite subjects -- because of the large blossoms and the sky-blue backgrounds that he was very fond of.
Another thing is he was inspired by Japanese printmaking with the bold outlines.
So that's something that Vincent Van Gogh was able to create to make the "Almond Blossoms" painting.
And I think that's it.
So we're going to go ahead over.
The next stop is going to be my kitchen.
Are you guys ready?
All right.
Let's go.
Off to the kitchen we go.
Welcome into my kitchen.
All right.
So, this is my lovely kitchen.
The first thing we're going to talk about is some of the cards that I have on my refrigerator.
Would you consider greeting cards to be art?
Hmm.
I agree with you.
I think they can be considered art.
So, I've received some postcards from where some family and friends have traveled to.
I know we can't do too much traveling right now, but when we are able to again, I suggest that you get some postcards and send them to your friends and family while you're on vacation.
So, I have some postcards that were given to me from Italy.
This one is of the Ponte Vechio.
Beautiful.
You should go sit and watch the sunset.
They also have a postcard from the Leaning Tower of Pisa.
Just like now, I'm going to be leaning.
Just kidding.
I'm back.
I also have some congratulatory cards that were given to me.
And I have a postcard from the Philippines that someone mailed to me.
I'm from the Philippines, in case you were wondering.
And I also have some thank-you cards, cards from parents and students thanking me for teaching them some art during the school year, so I kept those.
And that's it for the fridge.
So, you can always hang your postcards on your fridge or in your bedroom and then use it for decoration.
So I hope you get inspired to start sending postcards or even making some of your own.
Right?
Okay.
I decided to hang some of my paintings that I created, and that's what I'm going to share with you today -- The artwork that's in my kitchen.
Point to the artwork so, that way, you know which painting I am describing.
Here we go.
So, above my refrigerator is a landscape painting that I created right over there.
And a landscape painting is something that's created horizontally like this -- horizontally.
And it shows a wide view of the landscape.
So, the wide view here is showing the clouds in the background, the mountains and palm trees in the foreground.
And then right over there is a dog and his owner walking, going for a walk.
Moving on.
Next to that landscape painting is a painting that was created, inspired by Vincent Van Gogh.
Does anyone remember the artwork I talked about in the bathroom?
If you said "The Starry Night," you're correct.
So, with inspiration of "The Starry Night," I replicated and copied into those swirls, right?
And I used that to inspire my ocean background for the goldfish.
And the title of this painting is "Healthy Fish."
I know you can't see it, but I'll try to do a close-up later.
Instead of seaweed, I created asparagus, a vegetable.
And I also put some grapes in this painting instead of some coral reefs.
I thought it was really funny.
Hee!
All right.
So that is also done in wet paint.
Moving right along.
Next to our "Healthy Fish" painting is a painting I created while I was studying abroad in Italy.
I studied in Florence, and one of the classes that I took was called an outdoor painting class.
And in this outdoor painting class, the professor would have us meet in different areas around town.
We picked the subject area, what we wanted to paint.
Okay?
The next painting we have is a painting that I created when I was painting outdoors.
A painting I really enjoyed creating.
I painted it during the fall season, and it was in a park called Nomahegan Park in Cranford, New Jersey.
And one of the things I loved about it is that it's the top view where -- when the trees were changing colors.
So, in the fall, what are some colors that the leaves turn into?
Right?
'Cause usually leaves are green.
So if you said sometimes we get some orange leaves and some yellow leaves.
I really love all the different colors.
When it becomes fall season, I would suggest that you go take and explore all the different colors of the leaves.
That'll be fun.
Okay.
And then the next painting is a painting that I created in college again.
It is an oil painting.
And it's not an original.
It was a painting -- I can't remember the name of the artist at the moment, but I loved it so much because of the painterly brush strokes, right?
As I talked about on the tour in the bathroom, I love things that have some texture to it.
So I decided to replicate that painting.
Okay, the next one is a still-life painting.
How many of you have learned about still-life paintings in your art classes?
You have?
Great!
So maybe while you're home, you can create another still-life drawing or painting.
So that was just an exercise that we did at one of the professional developments that I attended.
And it was good practice.
And then the last one we have on top of my kitchen is a flower painting.
This flower painting was just a fun painting I decided to do.
And I love the colors of yellow.
It's bright, and sometimes yellow can represent happiness.
I think that I was feeling really happy when I was painting that.
And those are the artworks and paintings in my kitchen.
Here's a close-up view of all the paintings on top of the kitchen.
On to the next one.
On the counter dividing my dining room and my kitchen, I have my mannequin person.
This is used to help... figure drawings, which is another type of art.
I like to display that over there.
And they have this small painting that I created with my cousin when I was visiting her in California.
And we painting what we were seeing.
Maybe after today's episode, you can look through your window and paint or draw what you see through your window.
All right.
Now let's talk about the painting that are above my dining table.
These three paintings are probably my top three paintings that I've created so far.
And they were all painted and created while I was in college.
I went to Montclair State University.
Where do you think you'll go to college when you're ready?
Your like, "That's so far away!"
But don't worry.
I'll come sooner than you think.
So, the first painting, I was inspired by an ad that I saw in Architectural Digest magazine, and the ad had a tree going through a window then inside the home.
Crazy, right?
So, it really stopped me in my tracks, And I decided to create some sort of version of it.
So what I did was I had to first figure out the layout of my painting.
Then my professor helped me to create realistic floors, wooden floors.
So that took a really long time.
This overall painting took me about half a semester, which I'm very proud of, and I'm glad that I took the time to create this painting.
And so I replicated the ad and making a tree branch that was coming from a window and into a room.
The title of this painting is called "Wind Swept."
You can't see it right now, but I'm gonna do a close-up version so that you can see.
And the curtain is sort of swept through into the room, so the wind is blowing in.
And with the tree branches, I created them out of chipboard.
Chipboard is thinner than cardboard but a little bit thicker than regular paper.
So it gives it some dimension.
Right?
It's sort of popping out at you.
And we all know my love of texture.
I decided to use a lot of paint to create that tree-bark replica.
And I really loved how it turned out.
So I hope you guys enjoy it and get inspired by it.
So, the next painting.
So, this was my second painting that I created right after this one.
Again, I was playing around with, guess what, texture!
You're right.
So I created using the chipboard again, and I ended up gluing it onto the canvas.
Oh, yeah, sorry.
By the way, I glued in the tree branch onto this painting after the painting was completed.
So, this painting is called "Where's Waldo?"
You're like, "Huh?"
Where's Waldo is just that character that has the red and white stripes with a hat.
But my lizard is Waldo, and I think he sort of gets blended into the background.
So, we have the ocean in the background, then in the foreground, we have the rocks and some trees shrubs and grass, some flowers.
This one, I played around and experimented with the ocean 'cause I wasn't sure if I wanted to do a solid-blue color, as you can see from the corner, or I decided to, in some sections, do different values of blue.
So I used some light blue, some medium blue, and a really dark blue to capture the ocean waves.
So I was very happy with that.
And it inspired me to create this third one over here.
So, this flower-like image, it's not really specifically a flower, but again, going with the chipboard theme, I decided to save the extras from creating these two branches, and then throwing the chipboard out, I created organic shapes, right?
Organic shapes are shapes that are found in nature.
They most resemble, like, rocks or pebbles.
And I put some tree trunks in the background, but this time I put it directly on the canvas.
And the title of this painting is called "What Goes Around Comes Around."
To me, when I start from one corner, it makes my eye want to move and go all the way around the painting to see what it's about.
And the muted colors that I decided to paint this painting with is sort of calming for me, right?
We talked about how art makes me feel calm.
The greens and that muted blue was really nice when I was painting this artwork.
All right, so that's what we have displayed in my dining room.
The next place we're going to go visit is my living room.
Here's a close-up of my paintings in the dining room.
This is my living room.
Welcome.
This is a painting that I created during my study-abroad experience in Florence, Italy.
Again, it was one of the parks, and we were outside painting.
Usually the people come up behind you and like to see what you're painting when you're painting outdoors.
The next artwork we have... is a sketchbook assignment that I participated in with other art teachers in Jersey City.
The title of this is called "Wanderlust."
And I was inspired by the cable car that we took to go check out the Big Buddha in Hong Kong.
And it was nice because you could see the sunset while you were riding the cable car.
This is another painting that I created for one of the professional developments I attended.
Do you know what type of flower this is?
Can you take a guess?
If you guessed bird of paradise, you are correct.
Yay!
Congratulations!
All right.
The next piece of artwork we have is a felted-wool project that I took at another professional development.
I go on so many professional developments!
And it's more of an abstract design.
Not really anything there, but I just love the colors of yellow, blue, green.
And it was my first time playing around with fibers and creating a felted-wool project.
I decided to display it in a shadowbox.
All right.
This painting over here, this square painting, I painted in college, as well.
It is made from oil paints.
Show you guys up close so you can see.
And this painting reminds me of summer.
Why do you think this painting reminds me of summer?
If you said the colors... Mm-hmm.
Reminds me of summer because of the colors of the sunset with the yellows, the light orange, the ocean-blue, and I was really inspired to create repeating line design.
I repeated the line, curved lines all the way through.
And these remind me of kind of, like, a beach ball that you can play.
All right.
Moving along.
The next artwork is something that I purchased when I was visiting Sydney, Australia.
Down Under, mate!
Just kidding.
And it's showing, representing the Sydney Opera House and the Darling Harbour Bridge and some fireworks in the background.
During my trip was New Year's, and they had some fireworks on the Darling Harbour Bridge that we got to go see.
Moving right along is another artwork that I purchased and did not create myself.
It's a fantail bird, which is native to New Zealand.
And during one of our hikes in New Zealand, we actually spotted a fantail bird, so that was pretty exciting.
That's why I decided to purchase this artwork, and it was made from an artist in New Zealand, which is great, 'cause I love supporting other artists.
We also have some art that we created during summer camp.
So it's playing around with ink and the book and string.
Turned out to be a beautiful abstract art.
Next, I'll show you some close-ups of the artworks in the living room.
Now we're going to head back into the studio space and learn about some value.
Ready?
Let's go!
Did you enjoy the tour of my apartment?
Great, I'm glad that you did.
And obviously this is our studio space, so welcome back.
And we're going to get ready to create some art.
For today's lesson, you're going to need a pencil.
Preferably something with an eraser.
So, pencil.
Paper.
It can be paper that has writing on the back, and that's okay.
So you want to find some scrap paper that maybe you're not using anymore.
You're going to use the clean side for today's project.
And a positive attitude.
Positive attitude?
What do you think I mean by having a positive attitude?
Okay.
I think a positive attitude means trying your best and being open to learning something new.
All right.
I'm going to give you 15 seconds to get your supplies so that we can get started together.
1 New Jersey, 2 New Jersey, 3 New Jersey, 4 New Jersey, 5 New Jersey, 6 New Jersey, 7 New Jersey, 8 New Jersey, 9 New Jersey, 10 New Jersey, 11 New Jersey, 12 New Jersey, 13 New Jersey, 14 New Jersey, 15!
I hope you have your pencil... your paper... and your positive attitude.
All right.
Here we go.
Now that you have your materials together, let me ask you a question.
True or false -- can you use a pencil to create different lights and darks of the color gray?
What do you think?
If you think it's true, give me a thumbs up.
If you think it's false, give me a thumbs down.
And if you're just not sure, give me a sideways thumb.
Why don't we find out together and let's explore this?
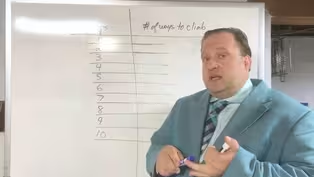
All right, so the first thing we're going to do is we're going to learn to make a value scale.
Value, again, is the lightness or darkness of a color.
Using my pencil, we're going to first create... five boxes going across our paper, so you want to hold your paper landscape-style, horizontally.
Gonna put my paper on my board right here.
Then -- I said, again, five boxes.
You have one, two, three, four, and five.
I'm going to use a Sharpie marker so that you can see my pencil better, but you guys at home continue using your pencil to make your boxes while I get my Sharpie marker.
One box.
Two box.
Two boxes.
Three boxes.
And four and five.
Again, using your pencil, we're going to try and see if this gray pencil is going to give us some lights and darks.
So, with a value scale, we're going to practice going from light to dark.
One of the things I want you to practice when you're doing the first box is holding your pencil on the eraser end and using it very gently.
So think of it as if you're holding your baby brother or sister or a baby cousin.
You want to be very gentle, right, 'cause they're still young and fragile.
So try your best and hold your pencil from the eraser point just like so.
So, that first box, we're going to not put as much pressure so that we can get a really, really, really light box.
Okay, now we're going to move on to the second box and add a little bit more pressure, so, that way, we can make a darker color of our pencil.
As we move on to the third box, do you think we're going to add a little bit more pressure to our pencil?
That's correct.
So, now you can start moving up on your pencil.
Before, we were at the eraser end.
We're gonna move our fingers towards the middle.
And it's okay if go outside of your box.
The goal is trying to move in a nice, smooth transition from light to dark.
And our fourth box, we're gonna add, again, more pressure to our pencil.
One of the ways to make it darker is to go over what you just colored in.
All right, so, for our last box, you want to try to put as much pressure on your pencil as you can to make it the darkest box out of all five boxes without having to make a hole in your paper.
'Cause I know sometimes students like to be a little bit aggressive when they get to the darkest spots.
But you want to apply as much pressure as possible without making a hole on your paper.
And there you have it.
That is a value scale.
Gonna write it on top of our paper, and while I'm writing, you can write that, as well.
So, this is called... our value scale.
And so if you were wondering, yes, it is true -- we can create different grays using just our pencil.
All right.
Now that you are more familiar with value, we're going to get to the project part.
Are you guys ready?
Thank you.
I'm so glad that you're a part of this.
As you're continuing and finishing up your value scale, I'm going to set myself up for the next project.
How you guys doing on those value scales?
And it's okay if you don't have it on your first try.
That's why I like to tell students practice makes progress, right?
I'm going to leave this value scale up here so that you can refer to it in case you need it.
For our next project, you can again use any piece of paper that you have available at home.
It can have writing on the back just like this one.
And you're going to take your pencil.
So, how many of you are familiar with the artwork called the "Mona Lisa"?
Raise your hand.
Okay.
Well, we're going to -- If you're familiar with the "Mona Lisa," let me show you.
If you're not familiar with the "Mona Lisa," this is the "Mona Lisa."
"Mona Lisa" was painted by Leonardo da Vinci.
And we're going to do something with -- using her hands as inspiration, okay?
I'm gonna hang that up here for you so that you can take a look at it.
And we're going to do something with our hands today.
I hope you guys are wearing some comfy socks at home, or maybe you're not wearing any socks, but I wanted to share with you.
Guess who's on my socks!
The "Mona Lisa"!
Okay.
Sorry.
I just get too excited.
So, we're gonna have our pencil.
And like I said before, we're going to do something.
based on "Mona Lisa's" hands.
Hands are very important, especially now, with everything going on.
Everyone keeps talking about, make sure you wash your hands, right?
So, hope those of you at home continue to wash your hands.
Make sure you wash your hands with soap.
And at least for 20 seconds.
And remember to sing yourself "Happy Birthday," even if it's not your birthday.
All right.
Here we go.
So, I am a righty.
And those of you that are not righties, maybe you are a lefty or maybe you can write with both hands, which is totally cool.
I wish I could write with both hands.
But, no, I'm a righty.
So if you are a righty like me, you're going to be tracing your left hand.
If you are a lefty, not like me, you're going to be tracing your right hand.
Okay, so, because I am a righty, I'm going to be tracing my left hand.
Okay, so, we have our first hand traced.
And looking at the "Mona Lisa," how are her hands placed?
Are they side-to-side?
Are they on top of her head?
Or are they placed on her lap and overlapping?
That's right.
They're placed on her lap and they're overlapping.
What's overlapping?
If you're not sure, let me give you an example.
I have my colored pencils, and I have my tissue box.
Okay.
Gonna take my colored pencils, and I'm gonna put my tissue box right on top.
My tissue box is overlapping right on top of my colored pencils.
So... I have my hands, and they are in overlap.
Now we're going to take -- Go ahead and trace your hand for your first hand.
Right?
So, we're going to be tracing our first hand.
Are you guys done tracing your first hand?
Okay.
Again, because I'm a righty, I'm gonna be tracing my left hand again, and I'm overlapping, overlapping the first hand that I drew.
All right.
Now that my hands are overlapped, I want to give you some time to go ahead and trace your hand again.
And if you're not too good at tracing your own hands, maybe you can ask a trusted adult at home or maybe an older brother or sister to help you trace your hands.
If you are struggling, you put your hand on your paper and have the trusted adult or your brother or sister help you trace your hands on the paper.
All right.
Go ahead and do that now.
All right.
So, I wanted to show you.
First, we traced the one hand.
Then we overlapped, and we traced the hand again on top of the first hand that we drew.
Okay, so I hope you're all caught up.
Now we're going to move on to our third step.
Okay, so step number one.
Step number two.
And now we're going to do a step number three.
Now that we have our "Mona Lisa" hands in place, we're going to add some triangles.
Triangle.
What do you think a triangle is?
It's a shape.
Okay.
How many sides does a triangle have?
Three.
Correct.
So, I have this triangle over here.
Triangle.
It has three sides.
One, two, and three.
So, now that we know what a triangle is, we're going to create some triangles on the backgrounds of our hands so that we can break up our paper.
Watch and see.
Triangle.
It has one, two... and three sides.
One, two, three.
Okay.
Just wanted to fix that a little bit.
And then...make a triangle.
One, two, and three.
One, two, three.
And there you go.
So that has one, two, three... four, five... six, seven, eight, nine.
Everyone's going to have different amount of triangles depending how much you want to break apart your paper.
All right, so, we have our triangles.
Now, what did we just learn earlier?
You forgot already?!
Oh, my goodness!
What am I going to do?
Oh, you remember.
You remember.
Okay.
We learned about value and creating a value scale.
So make sure you have your value scale right next to you so that it can help you when you're coloring in your hand project, your "Mona Lisa" inspired hand project.
Well, I'll show you an example of step number three.
Right?
We traced our hands two times, and then we broke up our paper into triangles.
Let me hang this up for you.
Okay.
So, again, I'm just going to go over it as you are dividing your triangles at home.
Step one, we're going to be tracing our hand that we don't write with.
Because I'm a righty, I traced my left hand.
Then again a second time and overlap them just like the "Mona Lisa" hands.
Okay.
Overlap.
"Mona Lisa" hands.
Then the third step is you're going to break up your paper into triangles, right?
We learned that a triangle has three sides.
Just like this triangle I have here.
Are you guys ready at home?
Now, we're going to practice with our pencil, creating a value of each of those spaces.
I'm going to start in this corner over here very lightly.
Remember, I'm holding it by my pencil side.
And then let's add more pressure, just like we learned in our value scale.
I'm gonna move toward the pencil point of my pencil.
Okay?
Very nice.
You can also start from going dark and working your way out to lighter, to a lighter value.
So I'm going to do this section over here, my thumb.
And work my way out to a lighter value.
All right.
How are you guys doing at home?
You can work as much as you want now and then take a break or you can continue and follow along.
Let's go really light in this area.
Okay, I'm adding a little bit more pressure as I work inwards.
Again, moving my pencil -- or my fingers closer to the pencil point.
Is this relaxing for you guys at home?
To me, it's very therapeutic.
Right?
You're focused on one section, whether it's your fingers or the triangles, and you're continuing practicing value.
Let's move to another section.
Kind of reminds me of a mountaintop.
If your pencil point starts to get a little dull, you could take a break to era-- "Erase it."
Sorry.
Sharpen it.
Oh.
It's on the table.
I'm back!
Going to take some time to sharpen.
Have a nice, pointy pencil.
Right, so, there's different ways that you can go about this.
For this one that I did of the thumb, I started with my darkest value, and I worked my way lighter as I went out, outwards.
I also did very light on the outer edge.
And as I worked my way to the middle, or the center, I got a little bit darker.
Or you can go like a mountain, light and then all the way down to get to your darkest value.
Let's see.
What section should we do next?
My pinky?
Okay.
This is my pinky.
Okay, we're going to continue my pinky again.
Okay, so, those of you that might just be joining us now, let me go over what we've been working on.
Okay, so, welcome.
We've learned about value.
Value is the lightness or darkness of a color.
And we learned how to create a value scale from light to dark.
We learned about the "Mona Lisa," who was painted by Leonardo da Vinci.
And then we created a project based on her hands, right?
Overlapping hands.
So, the first one was we traced our nondominant hand.
Dominant means the hand that we use most often, right?
Because I'm a righty, I traced my left hand.
I traced my left hand twice in an overlapping composition.
Then, once we did that, we created a triangle to break up our paper.
I think you're fully caught up now.
Great.
So, those of you at home that are still working on this.
let me show you what a finished pencil project would look like.
Right.
So, this is what a finished "Mona Lisa" hands inspired practicing value would look like.
All right.
For those of you that have paint at home, you could also do this with paint.
I did one in colored pencil.
For those of you that have colored pencils available, you can try to do it with some color.
And you can also practice the value scale in colored pencil or in paint.
Okay?
This time I chose to use red paint.
Then I add a little bit more white to it, and I got that color.
And a little bit more white, and I got that color.
Added a little bit more white, and I got that color and resembles the color pink, right?
When you add enough white paint into your red paint, you get pink.
There are many different ways you can do this project.
I hope you explore and try them out.
We saw a lot of art today around my apartment, wouldn't you think so?
when you're done with your hand value project, why don't you take a walking tour of your own home to see if you have any art lying around?
If not, it's totally Okay 'cause now you'll be able to have one homemade art piece that you made.
So be sure to hang it on the wall in your home or refrigerator, anywhere you think that everyone can see it and can ask you what you've created.
All right.
Before we go, I want to share a few other things.
Now that we're all stuck at home, which is sometimes a good thing, sometimes a bad thing -- but we're all in this together, right?
If you've been helping cook around the house, right, before you threw out those cans, we can turn it into art.
So, you would take out the wrapping.
You could have a trusted adult in your home come help you.
All right.
So, you would take off... Just like so.
And then you can practice what we learned.
Value.
Right?
Taking one color and getting the lights of that color -- light to dark.
I used my red paint, and then I got to my lightest color, which was pink, by adding white paint to the red.
And this would be a nice thing you can use to hold your pens and pencils... for your desk at home.
And I hope you're supporting restaurants and local businesses.
These were filled with sauce.
I saved it, and I washed it.
And this is where you can put some paint if you have -- if you don't have a paint palette at home.
So you could use and recycle these.
Right?
Supporting local restaurants.
When you finish all your eggs, you can use it for putting some paint in.
Or even a container like this.
Right?
Just make sure it's thoroughly washed, so, that way, you don't get any of the food residue left over.
Another thing that I found is, after I'm done with my yogurt, take off the wrap, the peel.
And you can again practice some value and create some art at home.
In my new container that I painted, I put some paper clips.
My new paper-clip holder.
Okay.
So, now, we are recycling some of the things that we would have normally thrown out.
Another thing you can do at home is create a card for a loved one or relative that's far away if you want to ask how they're doing, check up on them, write them a nice note, a beautiful card.
Right?
So, I have this.
I drew some hearts on there, and I practiced some value.
This is another one that I started.
I drew my hearts on there.
And why don't I show you how you can decorate this one?
Yeah?
Good idea?
Let's go.
I'm going to take my pencil... and gonna very carefully... color it in.
All right.
So, just with a pencil, we can still create a nice card for someone.
People that may not have any family members nearby, such as people that are living in the nursing homes, that would be a nice idea for you to write to them saying how much you know that we're all struggling right now, but we're going to be okay 'cause we're going to work through this together.
So maybe contact a local nursing home.
Of course, with the permission of a responsible adult in your house.
Ask them if you can write to one of the senior citizens, just letting them know you're thinking about them and sending nice positive thoughts.
to my good friend Kimberly.
So, I'm gonna write, "I value our friendship."
"Value."
Get it?
All right.
You're probably wondering if you can go check out the "Mona Lisa."
Actually, you're in luck.
You can actually go check out the "Mona Lisa" virtually to go visit her in the Louvre.
The Louvre is located in Paris, France, just like we saw in my bookshelf, the Eiffel Tower painting.
The great thing about virtually traveling is you don't have to bring -- Hold on.
When you're going to go virtually travel to see the "Mona Lisa," you don't have to lug around a heavy luggage.
You can do it from the comfort of your own home.
How exciting is that?
So have fun with that, asking a trusted adult in your home to go on the Internet and look up museums or galleries or really anything that you want to virtually travel to right now.
They're making it available to you, which is awesome.
To end our lesson, you can write on the back of any worksheet.
Use the clean side.
And share what you learned out of today's episode once you go back to school.
That way, you can remember.
Keep your artwork in a safe place so you can go and show your art teacher when you return to school.


Support for PBS provided by:
NJTV Learning Live is a local public television program presented by NJ PBS