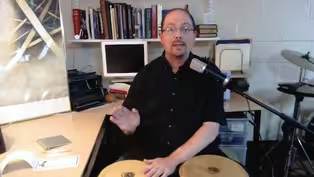
Build a Boat! - Dena Orfanitopoulos - Fourth Grade
5/4/2020 | 56m 51sVideo has Closed Captions
Students will build a boat that can float and support weight using Engineering Design.
Students will build a boat that can float and support weight using the Engineering Design Process. Created by NJTV in partnership with the NJEA and the NJ Department of Education, NJTV Learning Live remote learning classes are for grades 3-6, taught by NJ public school teachers. One-hour lessons include math, science, English language arts, social studies, physical education and more.
Problems playing video? | Closed Captioning Feedback
Problems playing video? | Closed Captioning Feedback
NJTV Learning Live is a local public television program presented by NJ PBS
Build a Boat! - Dena Orfanitopoulos - Fourth Grade
5/4/2020 | 56m 51sVideo has Closed Captions
Students will build a boat that can float and support weight using the Engineering Design Process. Created by NJTV in partnership with the NJEA and the NJ Department of Education, NJTV Learning Live remote learning classes are for grades 3-6, taught by NJ public school teachers. One-hour lessons include math, science, English language arts, social studies, physical education and more.
Problems playing video? | Closed Captioning Feedback
How to Watch NJTV Learning Live
NJTV Learning Live is available to stream on pbs.org and the free PBS App, available on iPhone, Apple TV, Android TV, Android smartphones, Amazon Fire TV, Amazon Fire Tablet, Roku, Samsung Smart TV, LG TV, and Vizio.
Providing Support for PBS.org
Learn Moreabout PBS online sponsorshipMore from This Collection
NJTV Learning Live is a class for fourth graders taught by NJ public school teachers.
Songs for the Campfire or Couch - Ed Stroh - Fourth Grade
Video has Closed Captions
Students will learn about the history of campfire singing and engage in group singing. (56m 47s)
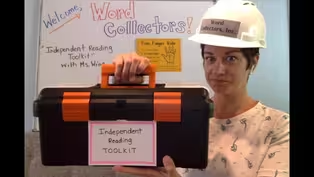
Independent Reading Toolkit - Lauren Wing - Fourth Grade
Video has Closed Captions
Students will practice three independent reading strategies. (55m 25s)

Just the Facts! - Zoila Correa - Fourth Grade
Video has Closed Captions
This lesson explores factors & multiples building upon students’ understanding of arrays. (56m 20s)
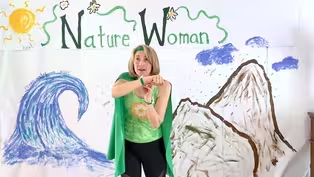
Erosion Avengers - Jill Falk - Fourth Grade
Video has Closed Captions
Mrs. Falk uses her imagination to transform herself into a superhero, Nature Woman! (56m 36s)
Acute and Obtuse Angles - Jill Turner - Fourth Grade
Video has Closed Captions
Students will learn all about lines and angles and how they apply to real-life situations. (57m 13s)
How Do Sounds Become Music - Domenico Zarro - Fourth Grade
Video has Closed Captions
Students will explore the elements of rhythm and beats to understand how music is created. (55m 1s)
Natural Disasters - Michael DeMaio - Fourth Grade
Video has Closed Captions
Follow along as Mr. DeMaio teaches you about incredible types of natural disasters. (55m 10s)
Area & Perimeter Word Problems -Tara Casalunovo-Fourth Grade
Video has Closed Captions
In this math lesson, students will learn how to solve area and perimeter word problems. (56m 5s)
My Dream, Your Dream, Our Dream -Pedro Trivella-Fourth Grade
Video has Closed Captions
This bilingual lesson prepares students to be successful members of our diverse society. (56m 13s)
Producers vs. Consumers - Chase Wesley - Fourth Grade
Video has Closed Captions
This lesson introduces the differences between consumers and producers. (57m 6s)
Song Form - Chloe Norell - Fourth Grade
Video has Closed Captions
Students will learn about song form and explore these forms through analysis and dance. (57m 48s)
Become a Geometry PRO! - Lauren Proda - Fourth Grade
Video has Closed Captions
Students will learn about the properties of triangles, squares, and rectangles. (57m 8s)
Providing Support for PBS.org
Learn Moreabout PBS online sponsorship>> Hi, super thinkers.
I'm so glad you can join me today.
We are going to have so much fun in this next hour.
My name is Miss Orfanitopoulos, and this is my assistant Chewy.
I am a teacher in Hazlet.
I teach kindergarten at Sycamore Drive Early Childhood Learning Center and grades 1 through 4 at Middle Road Elementary School.
Hi to all my students.
I miss you guys so much.
I just want to give a shout-out to all of the teachers in New Jersey and all over the world who are doing such an amazing job during this time.
Keep it up.
You're a rock star.
Today, we are going to learn all about boats and what makes them float.
And we are going to be building our very own boat.
I can't wait to teach you all about it.
So let's start first with a book that we're going to read together.
So today we're going to do some thinking.
We're going to be thinking outside the box to come up with some new ideas and discover some new things.
So we are going to read a book that I love so much.
This is called "What Do You Do With An Idea?"
It's written by Kobi Yamada.
and it's illustrated by Mae Besom.
So let's see what we would do with an idea.
"One day I had an idea.
'Where did it come from?
Why is it here?'
I wondered.
'What do you do with an idea?'"
Do you have any ideas?
"At first I didn't think much of it.
It seemed kind of strange and fragile.
I didn't know what to do with it, so I just walked away from it.
I acted like it didn't belong to me.
But it followed me."
"I worried what others would think.
What would people say about my idea?
I kept it to myself.
I hid it away and didn't talk about it.
I tried to act like everything was the same as it was before my idea showed up."
Do you sometimes ignore things that you think of?
Do you try to push them away?
Uh-oh.
His idea looks like it's getting bigger.
"But there was something magical about my idea.
I had to admit I felt better and happier when it was around."
"It wanted food.
It wanted to play.
Actually, it wanted a lot of attention.
It grew bigger, and we became friends."
"I showed it to other people, even though I was afraid of what they would say.
I was afraid if people saw it, they would laugh at it.
I was afraid they would think it was silly.
And many of them did.
They said it was no good.
They said it was too weird.
And they said it was a waste of time and that it would never become anything."
What do you think you should do if somebody says that to you or if you think that about your own ideas?
Do you think you should give up and stop trying?
I don't think so.
"And at first I believed them.
I actually thought about giving up on my idea.
I almost listened to them."
How do you think he feels?
He looks pretty sad.
But then I realized, what do they really know?
This is my idea, I thought.
No one knows it like I do.
And it's okay if it's different and weird and maybe a little crazy.
I decided to protect it, to care for it.
I fed it good food.
I worked with it.
I played with it.
But most of all, I gave it my attention."
What do you think might happen now with this idea?
"My idea grew and grew, and so did my love for it."
Now he looks a lot happier that he is working with his idea.
"I built a new house, one with an open roof where it could look up at the stars, a place where it could be safe to dream."
"I liked being with my idea.
It made me feel more alive, like I could do anything.
It encouraged me to think big and then to think bigger.
It shared its secrets with me.
It showed me how to walk on my hands.
'Because,' it said, 'it's good to have the ability to see things differently.'"
You always want to look at things in a different way.
Sometimes when you look at something differently, you notice something else about your idea.
"I couldn't imagine my life without it."
Now he looks a lot happier.
"Then one day something amazing happened.
My idea changed right before my eyes.
It spread its wings and took flight and burst into the sky."
Look at his idea.
Wow.
It's totally changing.
"I don't know how to describe it, but it went from being here to being everywhere.
It wasn't just part of me anymore.
It was now a part of everything."
Look how he feels.
He looks so brave and happy, like he's ready to do anything now.
And then I realized what you do with an idea... you change the world."
I really love this book because it helps us think that if we have an idea, there's no bad ideas.
And even if we have an idea that we think is small, it can become anything.
It can become something bigger and something really amazing.
So today we're gonna see what ideas you have and we are going to put them to the test and see what we can make and create.
The first thing we're going to do today is to talk about why things float.
So I want you to grab a pen and paper, pencil, whatever you have nearby.
And we're going to write a list of materials that we think might float in water.
So think of some things that you have around your house.
Could these toy cars, some Lego pieces.
Write down anything that you think might float.
Here we go.
♪♪ ♪♪ ♪♪ ♪♪ ♪♪ ♪♪ ♪♪ ♪♪ Alright.
Do you have some ideas?
Now we're going to do a little experiment and test what materials might float or sink.
So I want you to get a small bowl -- something that you can fill with water.
It could be, like, a mixing bowl or a cup or something you might have in your house.
And I want you to get a trusted adult and carefully fill it up with some water.
You don't need to fill it to the top.
Just a little bit.
And gather some of your materials that you came up with.
I thought of a plastic egg, a Lego brick, a marker, some magnet builders.
And I'm going to see if they float or sink.
So, I'm gonna give you one minute.
Go around and get those materials and come right back here.
♪♪ ♪♪ ♪♪ ♪♪ ♪♪ ♪♪ ♪♪ ♪♪ ♪♪ Did you get your materials?
I got a whole bunch of things.
So, let's do a little experiment and see what things might float or sink.
So, here is a small brick.
And this one seems to be floating -- half, half.
Now, this brick is a bit hollow in the inside and solid on top.
If I flip it around the other way, it floats a little bit better because the water's not getting into it.
Let's try this toy car.
This one definitely sinks right to the bottom.
Just getting at my paper towels so I don't make a total mess.
You might want paper towels, too.
Let's try this pen.
Alright.
This one seems to float.
How about a pencil?
You think it's going to float or sink?
It floats.
Do you think you know why some of these materials are floating and some are sinking?
This penny is so small.
Do you think a small coin like this will float or sink?
It's pretty light.
Let's see what happens.
It sunk right to the bottom.
Now look at this plastic egg.
This egg is a lot bigger than the penny.
Do you think this is going to sink or float?
This one floats perfectly on the top.
Why does this big eggs float when the small penny sinks?
Test out any materials you have.
Is there anything else we haven't tested?
I have this magnet builder.
Let's see if this one floats or sinks.
Right to the bottom.
So, some of these items have buoyancy, and some do not.
Buoyancy is the ability to float in water.
These materials have buoyancy because some of them are more or less dense.
So if I take these two containers -- This one is filled with some Play-Doh inside.
And this one is totally empty.
If I put the heavier one in the water, it's probably going to sink.
Do you think?
Let's see.
Right to the bottom.
But if I take this one, that's empty, I think this one's going to float.
It floats.
This is less dense because it has air inside.
It's not filled with this thick material, so it's able to float around.
Now, another thing that is really important to objects floating in water is called water displacement.
When an object is put in the water, it pushes the water away, and then it takes up the space so that it has the ability to float.
So if I take these cans and we look at our water line right here, you can see this black line.
If I add in this can, it's going to push the water away to try to help this can float.
Now, this can is very heavy and dense, so it's not allowing that floating.
But you can see the water line is now above my black line, because the water is being displaced.
It's pushing away to allow room for this object.
And this is what happens with really large boats.
We can't see this in the middle of the ocean or a lake, but the water is getting pushed and allowing that to float up.
Now, many boats, we can't tell, but the inside of them are actually hollow.
The bottom part of the boat will be filled with empty space.
And that allows air to go in, and that helps make the bottom of the boat less dense to help keep it up and float.
Now, a guy a long, long time ago called Archimedes came up with the principle which states that the buoyant force is equal to the weight of the water an object displaces.
He discovered when he went in his bathtub, that when he went in his bathtub, all of the water rose up around him.
And he realized that that is what helps to create objects and allow them to float.
The water rises around you and displaces.
And you might notice that that's happened to you when you've gone in the bathtub.
You might fill it all the way to the top and think it's at the perfect level, and when you go in, some water overflows, or it goes down the drain.
Well, that's because it's displacing -- it's pushing the water away to make room for you.
Now, let's do another experiment.
I'm going to take this round tack and put it in my.. tub.
It sunk right to the bottom.
It's very dense because it's thick and heavy.
There's no air going inside, and it's not allowing any room for the water to help keep it up.
Now, if I take that... and I mold it and make it a little bit rounder... now this has room for air to go inside and the water to be able to sit around it.
It can displace the water, and it should be able to float.
Alright.
And it is floating.
It's floating now because there's air inside and it's letting that water displace but allowing a less dense object.
So even though it's still the same material and the same size, it's able to float.
So now that you learned about what makes things float, I'm going to tell you today's challenge.
You are going to be building your own boat and trying to get one that will float.
Before we start brainstorming and building our ideas, let's take a look at some real boats around the world so that you can see what type of boat you might want to build.
Hi.
Here's a canoe.
This is a small boat that's able to float on water, and people use it to do sports and go around on a lake or an ocean.
Have you ever been in a canoe?
Here I am all the way in Greece.
This is Kárpathos, Greece, and this is a fishing boat.
Fishing boats are used to go out and catch fish and octopus and all sorts of things.
And they're able to float on water, too.
Hi.
I'm in Dubai, and take a look at this boat.
It's just a small passenger boat that can take people around the lake.
Isn't it beautiful?
Hi.
I'm on this cruise ship.
Isn't it big?
This ship is able to take so many people across the oceans.
People use them to go on vacation or visit friends and family.
Some of these ships even have rides on them.
It's pretty amazing how this huge boat can be held up by the water.
Let's take a look at another one.
Take a look at this cargo ship.
Isn't it huge?
This ship carries things that we buy in our stores here.
It carried things from all different countries and places across the oceans.
It has so much weight, and it's amazing how it can still be held up in the water.
So, let's go back to my room and see how all of these boats can actually float.
Wow.
Weren't all those boats all so beautiful?
There are so many different kinds of boats, as you saw on our journey.
So today you are going to be creating your own boat, and your goal is to get it to float.
Before we start, let's review our engineering design process.
This is what helps engineers and people all over the world really think about what they're building and go through all of the steps before they actually begin creating.
It's always important to do that.
And that's what helps to make them so successful.
So our first step in the engineering-design process is to ask.
You always want to ask, what is the problem?
What is it that you're trying to figure out, and what are the constraints?
Are there any obstacles that you have to face?
Are there certain materials that you can use?
Is there a time limit?
All of those things count as constraints.
Step number 2 is to imagine.
You are going to research your idea.
You are going to brainstorm ideas.
You're going to be jotting things down and thinking of, how can I plan the best idea?
And then you are going to choose the best one to help you solve your problem.
Step number 3 is to plan.
You are going to draw a diagram and label it and figure out what is your setup going to look like.
All of your ideas, you're going to put them down on paper so that you have a plan to follow.
Engineers always come up with the plan before they start building.
If you rush into building, you might realize you forgot things and you might not do things correctly.
So it's always good to take time to plan out your idea first.
You will also gather all your materials and get everything ready so you're ready for step 4, which is when we actually create.
Step 4 is when you get to follow your plan and you get to build and you get to bring all of your ideas to life.
And then we always test out our design.
So whether it's today, we're going to see if our boat can float.
We're going to test it.
Maybe your other problem that you have is to do some other kind of experiment, or maybe you're going to test something out over a couple weeks.
Testing requires all different times.
It might not always be instant, but you want to test and you want to see if what you made works.
And then the fifth step and what I tell my students is the most important step is that we want to improve our design.
We want to think of how we can change it.
And sometimes it feels like what you made is perfect and it doesn't need anymore changing.
But we can always make things better, no matter what.
You can improve it and you can build upon it.
So step number 5 is so important because nothing is done correctly the first time.
It's always good to keep on trying and to keep on thinking what you can do differently.
That's an important piece.
So now we are going to use a design process to complete today's challenge.
Your challenge is going to be to build and design a boat that can float.
So let's think back to our first step, and that is ask.
What is our problem?
Our problem is to come up with a boat that's going to be able to float on the water.
So think about what we learned before about buoyancy and water displacement and objects being dense, as you think about how you're going to design your boat.
Also, think about what constraints you might have.
Do you have materials available that you need for building this boat?
Maybe there's something you want and it's not available right now for you, and that's okay.
Also, remember, I'm going to be giving you some time limits, so we're not going to be building all day long, but during this time together.
Now, if you want to do more building later, you, of course, can.
But for right now, we're going to try to build in this time that we have together.
So now we're going to do step number 2, and that is to imagine.
So I want you to grab a piece of paper and a pencil and just jot down any ideas you can come up with.
What type of materials might you have around?
What do you think you want to design your boat looking like?
Just jot down some ideas.
Don't make your plan yet.
But just take one minute and come up with some thoughts that you have for building a boat.
♪♪ ♪♪ ♪♪ ♪♪ ♪♪ ♪♪ ♪♪ ♪♪ Okay.
Did you do some good brainstorming and imagining?
Well, I did.
I thought that I can make a boat with paper.
I could try one with straws or sticks.
I know that I have some tape around my house, some card stock and index cards.
So I'm going to try to use some of these items to build my boat.
So now we're going to move on to our step 3, which is to plan.
So I want you to plan out your boat.
This time you're going to gather your materials.
So you're gonna go and find them and bring them back to where you're working.
And you're going to draw a diagram of what you really want your boat to look like.
You can label it.
You can point to what materials you're going to use for what part and how you're going to set it up.
And don't forget, if you still have your bucket of water, you want to keep that for when we're going to test out our boats.
If you didn't get one yet, then you're going and want to use some type of small bucket or something that you can fit a boat in.
So I'm going to give you two minutes.
Get your materials.
Start drawing your plan, and I'll see you back here.
♪♪ ♪♪ ♪♪ ♪♪ ♪♪ ♪♪ ♪♪ ♪♪ ♪♪ ♪♪ ♪♪ ♪♪ ♪♪ ♪♪ Alright.
I brainstormed and got all my materials.
Did you?
so I came up with an idea to build my boat out of paper -- a little bit thicker paper, this card stock.
And I'm going to use a straw to create a sail on top with a coffee filter.
And I'm hoping that this will leave a lot of open space for some air to go through.
So it will be less dense and it will be able to float.
I'm going to hope that this works out well.
So now we have gotten to our best and favorite part of building and the design process.
And that is our creation time.
So step 4, we are going to be able to create.
I want you to follow the plan that you made.
Try to stick to it as you're building.
And I'm going to give you five minutes to build and create your boat.
Don't test it yet.
Just build.
I'll see you back soon.
♪♪ ♪♪ ♪♪ ♪♪ ♪♪ ♪♪ ♪♪ ♪♪ ♪♪ ♪♪ ♪♪ ♪♪ ♪♪ ♪♪ ♪♪ ♪♪ ♪♪ ♪♪ ♪♪ ♪♪ ♪♪ ♪♪ ♪♪ ♪♪ ♪♪ ♪♪ ♪♪ ♪♪ ♪♪ ♪♪ ♪♪ ♪♪ Alright.
Did you finish building?
I did.
Here is my boat.
I followed my plan, and I built my boat with paper on the bottom.
It's kind of hard card-stock paper.
I put my little sail with the coffee filter, and I added a Popsicle stick to hold that up.
And I cut the paper so that I could bend it and fold it into a boat shape and give some air in the middle...and room.
So now we are ready to test out our boats.
So you can ask a trusted adult to help you.
Get some water and take your bucket over into a spot where you're able to test it.
Be careful.
We don't want to get too messy with this.
Alright.
So let's test out my boat and see if it's going to float or sink.
What do you think's going to happen?
Alright.
It looks like it's floating, if you can see.
So my boat does seem to be floating.
There is a lot of room for air to be in there, so it is less dense.
It's not very heavy material.
But I do notice that my boat is getting wet at the bottom and there is a little bit of water that is starting to leak through the corners.
Let's see what would happen if I did add a little bit of weight.
So I'm gonna grab some coins that I have here, some quarters.
And I'm going to add one dollar of weight onto my boat.
As I'm adding this, I can see -- I don't know if you can see -- that water is starting to come into my boat.
It's not holding up pretty well.
Now a lot of water is coming in my boat.
Can you see that?
A lot of water is going into my boat, and it is starting to sink.
You can see the water flowing in.
And now my boat has been completely submerged underwater.
So this boat was not as successful as I first thought.
I'm going to grab some paper towels.
You might need some towels so that it doesn't get too messy where you are.
And I'm going to take out my boat because it is all wet and not holding up too well.
And my coins sunk to the bottom with no boat.
Alright.
So looks like we need to go back to our drawing board and go back to our step number 5.
Do you remember what it was?
It's to improve what you built.
So I'm going to rethink about my boat.
It was built pretty well.
It was light, and it was able to float, but it didn't last very long.
So this time I'm going to try to use something that's going to help me get waterproof.
So I'm going to give you one minute to brainstorm some new thoughts of what you might want to improve.
So, did your boat float, or did it sink?
And if it sunk like mine, that's okay.
And even if your boat floated and it's still floating and it looks great, I want you to think about how you can make it better and stronger.
So let's start brainstorming, and let's think of a new idea.
♪♪ ♪♪ ♪♪ ♪♪ ♪♪ ♪♪ ♪♪ ♪♪ ♪♪ Did you brainstorm some new ideas?
I did.
So I am going to try to use tinfoil to see if I could wrap my boat up and make it a little bit stronger.
So I'm gonna redo my design, keep the same idea of having a wide bottom, but I'm going to put some more materials that can help it maybe be more durable so that it does last in the water longer.
I'm going to still use my straw and my sail, and I'm going to see what happens.
So I want you now to rebuild your design or improve it.
If you need to start over, it's okay.
Now's your time to try to make it even better.
So here we go.
♪♪ ♪♪ ♪♪ ♪♪ ♪♪ ♪♪ ♪♪ ♪♪ ♪♪ ♪♪ ♪♪ ♪♪ ♪♪ ♪♪ ♪♪ ♪♪ ♪♪ ♪♪ ♪♪ ♪♪ ♪♪ ♪♪ ♪♪ ♪♪ ♪♪ ♪♪ ♪♪ ♪♪ ♪♪ ♪♪ ♪♪ ♪♪ ♪♪ Alright.
So, did you finish improving your boat?
Did you create a new one?
Did you fix up your old one?
I made a new one since mine got soaked.
So it looks similar to my other one, except this time I added plastic wrap over it to kind of help it become more waterproof.
And I put a little tinfoil bottom.
And I used a straw for my little sail 'cause I thought it would be a little bit lighter.
So let's test this out and see how it goes.
You might need some help with your water, so you can ask someone to help you out again.
And let's see what is going to happen this time.
Well, it seems to be floating pretty well, and I don't see any water coming in this time.
Were you able to make yours a little bit more waterproof?
What materials did you use?
So it seems to have pretty good buoyancy, and it is floating.
So now for our extra challenge, we are going to try to make our boat even stronger and see how much weight it can hold.
So I want you to see if you have any coins around or maybe something that is a little bit heavy that you can add onto your boat.
Marbles might work, anything like that.
You might want to add a couple more things to your boat to help make it a little bit stronger.
So I am going to add a few more things, maybe some cardboard or Popsicle sticks, just to give it that extra sturdiness.
And I'm going to see how much weight it can hold.
Alright?
So let's try and redo this again.
♪♪ ♪♪ ♪♪ ♪♪ ♪♪ ♪♪ ♪♪ ♪♪ ♪♪ ♪♪ ♪♪ ♪♪ Okay.
I added some improvements to my boat.
What did you do to yours?
I put some Popsicle sticks on the side and some more tinfoil to see if I could get it a little bit more sturdy to hold the most weight that I can.
So I'm gonna put it back in my bucket... and I'm going to take some coins and add some dollar amounts to my boat.
So, let me start off with four quarters -- one dollar -- and see what happens.
It's still working.
Floating pretty well, holding everything up.
See if you can add some weight to your boat and see what happens with your boat.
Here are four more quarters for $2.
And it's still floating.
So I think because I was able to give it that nice, big bottom, it was able to have a little bit better water disbursement, and it was able to float.
It's less dense because it is hollow inside and I use lighter materials.
So see how your boat's doing.
If your boat is sinking and it's not holding up, see what kind of materials did you use.
Did you use something that's very heavy and thick?
Did you spread out your bottom?
Think of the boats we saw in real life.
Usually they all have really flat and big bottoms so that they can push down into the water.
So you want to try something like that.
I'm going to add a little more weight, just to see.
Here is $3 now.
And it's still doing pretty good.
Can you see this?
It seems to be floating pretty well.
You did such a great job today.
You were a super thinker.
Unfortunately, we are out of time for today's lesson.
But I'm so proud of all of your hard work.
So think back to our book when we first started -- what to do with an idea.
I want you to always take your ideas and keep them and try them.
Don't be afraid to try new things.
And remember the engineering-design process.
If you follow those steps, you will be able to be very successful.
Always plan out your design and brainstorm.
And don't forget the most important step, which is to improve.
Never be afraid to try again.
It's a good idea to do things more than one time, even two or three or four times.
That's okay.
So never give up, and always keep on trying.
I know you can do it.
And now that you're all experts in how boats float and everything to do with boats, I can't wait to see what else you can make.
I want to say hi.
to all of my students and everyone at Hazlet.
I miss you all so much.
And I know that your teachers miss you, too.
And I hope we are all back in school soon.
Thank you for joining me for this last hour.
Stay tuned and see some of the amazing boats that my own students in Hazlet created.
Keep watching.
Bye.
>> Hi.
My name is Liam, and I'm in 4th grade.
The materials I used for my boat was paper, cardboard, plastic water bottles, and tinfoil.
This was able to float very easily, and I was able to put weight on it.
That's all.
>> Hi.
My name is Maria, and I made a boat out of tinfoil, straws, and tape.
Let's see if it'll float.
♪♪ It's floating.
Yay!
>> We made the boats out of tinfoil and put the toys inside.
>> We shaped them like this so they're water-resistant.
♪♪ ♪♪ ♪♪ >> Hi.
My name is Mario.
I made my boat out of straws glue sticks, a hot-glue gun, scissors, a Sharpie marker, and a tape measure.
Let's see if it floats.
See?
It floats.
>> So this is my boat.
What we did with it was we covered it all in tape, because if you put the cardboard in just by itself and it's not covered in tape, it will get w-- ♪♪ ♪♪ ♪♪ >> And it floats.
♪♪ >> Hi, Miss O. It's Timothy B. from Miss Bischoff's 4th-grade class, and we're going to test out the SS Timmy and see if it floats.
♪♪ It floats!
Bye.
>> My name is Jonathan Marquez, and this is my boat.
♪♪ ♪♪ ♪♪ ♪♪ >> Hi.
My name's Ella, and this is my boat.
I built it out of tinfoil, Popsicle sticks, and the sides are made out of paper.
It's been sitting in the water for almost two hours now.
♪♪ >> Hi, Miss O. This is Sarah, and I'm from Miss Hedglin's class, and this is my boat.
♪♪ Yay!
It floats!


Support for PBS provided by:
NJTV Learning Live is a local public television program presented by NJ PBS