Building Bridges! - Dena Orfanitopoulos - Fourth Grade
4/20/2020 | 57m 24sVideo has Closed Captions
Students will think like an engineer and build a bridge that can support weight.
Students will think like an engineer and build a bridge that can support weight. Created by NJTV in partnership with the NJEA and the NJ Department of Education, NJTV Learning Live remote learning classes are for grades 3-6, taught by NJ public school teachers. One-hour lessons include math, science, English language arts, social studies, physical education and more.
Problems playing video? | Closed Captioning Feedback
Problems playing video? | Closed Captioning Feedback
NJTV Learning Live is a local public television program presented by NJ PBS
Building Bridges! - Dena Orfanitopoulos - Fourth Grade
4/20/2020 | 57m 24sVideo has Closed Captions
Students will think like an engineer and build a bridge that can support weight. Created by NJTV in partnership with the NJEA and the NJ Department of Education, NJTV Learning Live remote learning classes are for grades 3-6, taught by NJ public school teachers. One-hour lessons include math, science, English language arts, social studies, physical education and more.
Problems playing video? | Closed Captioning Feedback
How to Watch NJTV Learning Live
NJTV Learning Live is available to stream on pbs.org and the free PBS App, available on iPhone, Apple TV, Android TV, Android smartphones, Amazon Fire TV, Amazon Fire Tablet, Roku, Samsung Smart TV, LG TV, and Vizio.
Providing Support for PBS.org
Learn Moreabout PBS online sponsorshipMore from This Collection
NJTV Learning Live is a class for fourth graders taught by NJ public school teachers.
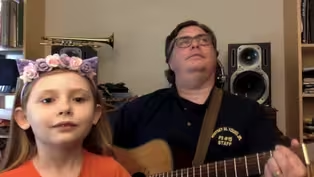
Songs for the Campfire or Couch - Ed Stroh - Fourth Grade
Video has Closed Captions
Students will learn about the history of campfire singing and engage in group singing. (56m 47s)
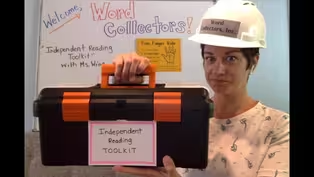
Independent Reading Toolkit - Lauren Wing - Fourth Grade
Video has Closed Captions
Students will practice three independent reading strategies. (55m 25s)

Just the Facts! - Zoila Correa - Fourth Grade
Video has Closed Captions
This lesson explores factors & multiples building upon students’ understanding of arrays. (56m 20s)
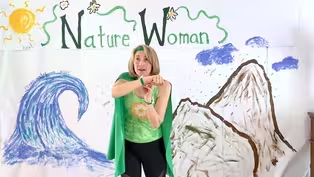
Erosion Avengers - Jill Falk - Fourth Grade
Video has Closed Captions
Mrs. Falk uses her imagination to transform herself into a superhero, Nature Woman! (56m 36s)
Acute and Obtuse Angles - Jill Turner - Fourth Grade
Video has Closed Captions
Students will learn all about lines and angles and how they apply to real-life situations. (57m 13s)
How Do Sounds Become Music - Domenico Zarro - Fourth Grade
Video has Closed Captions
Students will explore the elements of rhythm and beats to understand how music is created. (55m 1s)

Natural Disasters - Michael DeMaio - Fourth Grade
Video has Closed Captions
Follow along as Mr. DeMaio teaches you about incredible types of natural disasters. (55m 10s)
Area & Perimeter Word Problems -Tara Casalunovo-Fourth Grade
Video has Closed Captions
In this math lesson, students will learn how to solve area and perimeter word problems. (56m 5s)
My Dream, Your Dream, Our Dream -Pedro Trivella-Fourth Grade
Video has Closed Captions
This bilingual lesson prepares students to be successful members of our diverse society. (56m 13s)
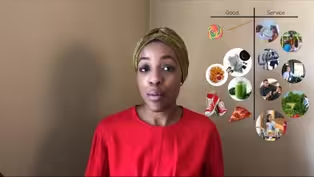
Producers vs. Consumers - Chase Wesley - Fourth Grade
Video has Closed Captions
This lesson introduces the differences between consumers and producers. (57m 6s)
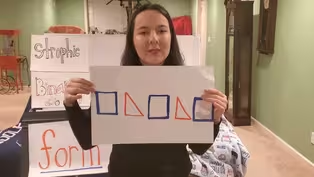
Song Form - Chloe Norell - Fourth Grade
Video has Closed Captions
Students will learn about song form and explore these forms through analysis and dance. (57m 48s)
Become a Geometry PRO! - Lauren Proda - Fourth Grade
Video has Closed Captions
Students will learn about the properties of triangles, squares, and rectangles. (57m 8s)
Providing Support for PBS.org
Learn Moreabout PBS online sponsorship>> Hi, boys and girls.
Thank you for joining me today.
I am so excited to see you.
My name is Ms.
Orfanitopoulos and this is my dog, Chewie.
I am a teacher in Hazlet, New Jersey, at Sycamore and Middle Road School.
So hi to all my Hazlet friends.
I miss my students so much, and I'm sure you miss your teachers and your friends, too.
But today, we are going to have so much fun.
We are going to learn all about bridges and we are going to build our very own bridge.
So, what I want you to do now is quickly gather some materials that you can use to build your bridge.
It can be anything at all.
You can find some paper in your house.
You can find some cardboard rolls, some Popsicle sticks, cups, maybe some soup cans or some coins to use some weight.
You might even have building materials, like wooden blocks or Lego.
So anything at all that you find.
Gather up some fun materials and bring them right back here so we can start building.
While you gather your materials, Chewie and I will just wait right here.
I know it looks like I might be in my classroom, but this is actually my home.
I took my posters and hung it all so I can feel like I'm back at school 'cause I miss everything so much.
So, before we get started on building, we're going to read a book today that I love.
This is called "Iggy Peck, Architect."
And this is written by Andrea Beaty and illustrated by David Roberts.
Have you read this book before?
Even if you have, it's okay to read a book more than once.
"Young Iggy Peck is an architect and has been since he was 2, when he built a great tower in only an hour with nothing but diapers and glue.
'Good gracious, Ignatius,' his mother explained.
'That's the coolest thing I've ever seen.'
But her smile faded fast as a light wind blew past, and she realized those diapers weren't clean.
'Ignatius, my son.
What on earth have you done?
That's disgusting and nasty.
It stinks.'
But Iggy was gone.
He was out on the lawn using dirt clouds to build a great sphinx."
He really loves to build.
"When Iggy was 3, his parents could see his unusual passion would stay.
He built churches and chapels from peaches and apples and temples from modeling clay."
See?
You really can build with anything.
"One night at dinner, to his father's delight, Iggy got a bright gleam in his eye and, out on his porch, built the St.
Louis Arch from pumpkins and coconut pie."
Oh, boy.
"Dear Ig had it made until second grade, when his teacher was Miss Lila Greer.
On the very first day, she had this to say.
'We do not talk of buildings in here.
Gothic or Romanesque, I couldn't care less.
about ancient buildings, ancient or new.'
She said in her lecture about architecture that it had no place in Grade 2."
Uh-oh.
I don't think Iggy's going to be too happy about that.
"That might seem severe, but since she was sincere, for when she was no more than 7, she had a great fright at a dizzying height in a building so tall it scraped heaven.
On an architect's tour of the 95th floor, young Lila got lost from the group.
She was found two days later, stuck in an elevator, eating cheese with a French circus troupe.
After that, it's quite safe to say, she thought all building lovers were nuts.
As a teacher, she taught that, above all, one ought to avoid them, no ifs, ands, or buts."
So she's scared and she's not letting anyone else do what they might want to do in their class.
"As you might guess, it would cause Iggy stress to hear such terrible talk.
But he didn't hear.
He sat in the rear while building a castle of chalk.
'You, Iggy Peck -- your desk is a wreck.
Tear down that castle right now.
You will not build in here.
Is that perfectly clear?
Do you need to see Principal Howe?'
'No, ma'am,' Iggy said.
He lowered his head, and his heart sank down to the floor.
With no chance to build, his interest was killed.
Now second grade was a bore."
It's not fun when we can't do things that we like.
"After 12 long days that passed in a haze of reading, writing, and arithmetic, Ms.
Greer took the class to Blue River Pass for a hike and an old-fashioned picnic.
They crossed an old trestle to a small island nestled in a heart of burbling stream.
But they no sooner passed the footbridge collapsed, and Miss Lila Greer started to scream.
'We're trapped here.
Oh, my!
Alas, kids, goodbye.'
Her eyes rolled back in her head.
She dropped to the ground with a vague groaning sound.
Luckily fainted, not dead.
The class was amazed.
They stood there quite dazed, uncertain of what they should do."
Who do you think might come up with a good plan?
"But one bright young man was off hatching a plan, which started with Miss Lila's shoe.
Soon, each lad and lass there at Blue River Pass was working together as one."
Did you guess Iggy?
You're right.
"And when she came to, Miss Lila Greer knew that something quite brave had been done."
What did they build?
"She looked in the air and saw hanging there a structure with cables and braces.
And on the far side, beaming with pride, was 17 smiling young faces.
Boots, tree roots, strings, Fruit Roll-Ups, and things were stretched ridge-to-ridge in a glorious bridge, dangling from shoestrings suspension."
That is one fancy bridge.
"It all became clear to Miss Lila Greer as he crossed that bridge over the stream -- there are worse things to do when you're in Grade 2 than spend your time building a dream.
Now every week at Blue River Creek Elementary, in second grade, all the schools kids can hear, along with Miss Greer, how the world's greatest buildings were made.
The weekly guest speaker, in T-shirt and sneakers, talks of buildings from Rome to Quebec.
Of course, he's the guy who builds towers from pie, that brilliant young man, Iggy Peck."
There he is.
So, he saved the day by building an amazing bridge for his teacher and his classmates to get across.
So, today, we are going to try to work on building our bridge.
So, let's learn a little bit more about bridges.
There are many different kind of bridges, but every bridge has what we call a deck.
A deck is the main horizontal surface of a bridge.
This is where you drive your car across.
This is where you walk or ride your bike.
There's always that deck.
Another important word for bridge is a pier.
A pier is what supports on the end of the bridge.
So, you can see that there are two what we might say posts or beams.
And these are what hold up the bridge.
One type of bridge is called a beam bridge.
A beam bridge can be a simple bridge.
Like, if you're walking in the park and you go over a river, you may have a bridge with two piers on each side and something that runs through the middle.
That is a very simple bridge.
Another kind of bridge is a truss bridge.
Do you see anything familiar about this bridge?
What shape do you notice in this picture?
That's right -- triangles.
Triangles are really strong shapes, so they're used to build a truss bridge.
They can give the proper support that the bridge needs.
Another kind of bridge is called an arch bridge.
Can you think of why?
That's because it has an arch that goes across it.
An arch is a curved structure that goes over an opening.
Another bridge is called a suspension bridge.
This is a really popular type of bridge.
You might have seen some even in our area that look like this.
A suspension bridge has cables that help to hold it up.
The cables have tension.
Tension is when something is pulling tight.
Think of when you're pulling a rope, something really hard, and you're pulling.
That tension is going to help get the cars and the trucks and the people across the bridge without falling.
Now that you know some of the important words that make up bridges and some of the kinds of bridges, let's go take a look at some bridges around our area and see what they look like in real life.
I'm here at the Golden Gate Bridge in San Francisco, California.
This bridge is a suspension bridge and it was built in 1937.
Isn't it beautiful?
It's over 1 mile long.
Come on, let's take a look at another one.
Hey, guys, I'm here in Australia at the Sydney Harbour Bridge.
Isn't it awesome?
This is an arch bridge.
You can see that there's triangles in the bridge, and that helps keep it so strong.
This bridge was built in 1932 and it holds railroad, cars, people, bikes on this bridge.
It's really beautiful.
Let's check out another one.
That was a quick flight.
I'm here in Japan at the Ikitsuki Bridge.
This is a truss bridge and it was built in 1991, which is pretty new.
This bridge connects two islands together to help people get across.
Isn't it cool?
All of the triangles help to make it so strong.
Let's check out our next one.
Do you know where I am now?
You may have been on this bridge before.
This bridge connects New Jersey with New York.
This is the George Washington Bridge.
It was named after who?
Our first president.
That's right.
This bridge was built in 1931 and it's a suspension bridge.
Can you see that large pier holding it up at the bottom?
It makes it so strong for all of the cars and people that cross every day.
This bridge was the longest bridge in the world until some new ones got built recently.
But this is such an important bridge, especially to us here in New Jersey.
Maybe your family even goes across this bridge for work every day.
Let's check out another famous bridge in our area.
Do you know a bridge I'm at now?
This is the Brooklyn Bridge in New York.
This bridge connects Brooklyn to Manhattan.
Can you see the beautiful city skyline behind me?
Look at all those tall buildings.
This is a cable and a suspension bridge.
You can see the wires above me and how they hold up the bridge.
This helps keep it so strong.
This bridge is very old and was built in 1883.
You might have walked across this bridge.
People come from all over the world to come here and walk, and we are so close to it, so maybe one day, you can walk across the Brooklyn Bridge.
Let's head back to my house so we can start our lesson.
Wow.
I am exhausted from all of that traveling.
Weren't those bridges so cool?
They're from all over the world, and you can see that people use bridges all the time to help solve problems.
Do you know what people are called who work on bridges?
They're called engineers.
Engineers are people who come up with a way to solve a problem.
And today, we're going to use the engineering design process so that we can think like an engineer to solve our problem and build our bridge.
So let's review the engineering design process.
The first step in the engineering design process is to ask, "What is the problem?
What is it that you're trying to solve?
What are some of the constraints?
Do you have certain amount of time?
Do you only have some materials that you can use?
What is it that you need to do?"
Step 2 in the engineering design process is to imagine.
You have to imagine, what is it that you want to build or create?
You're going to research your idea.
Maybe you're going to look on the computer or you're going to look on the Internet and the TV and figure out, what are some ways that you can solve your problem?
You're going to brainstorm as many ideas as you can think of and you're going to pick one that you think will work best.
Step 3 is going to be to plan.
This is when you're going to draw a picture.
Maybe you're going to sketch something out and label it.
You can use paper.
You can use a computer.
People use all different things to plan.
You also want to gather any materials that you're going to build with.
Step 4 is going to be when you create your idea.
You're going to bring your idea to life.
You're going to follow the plan that you brainstormed and you sketched out and you're going to always test your design.
So whatever your problem is, you're going to test it and see if your solution works.
And our last act in the engineering design process is to improve.
Engineers always think of how they can make things better.
They always look back on their steps and see, what could they do to get it to work better?
Even if something seems like it's the best solution, there's always something you can do to improve it.
So we always spend some time trying to improve our designs and make it better, and then we try again.
Engineers are not afraid to try things over and over and over again, even if it's 50 times.
So, let's start building.
And we're gonna use the engineering process to figure this out.
So, your challenge for today is to try to create a bridge that can hold weight.
Now, your weight can be anything that you have available at home.
It could be a book or a can of soup or even a toy car.
So, let's review our engineering design process together and figure this problem out.
Alright, so, our first step was to ask, right?
Yeah.
Alright, so, let's take some paper and a pencil and figure this out together.
So, what's the problem?
The problem is that we need to create a bridge.
And I need to think about what materials I have available in my house.
Hmm.
I know I have some wooden blocks.
I know I have some canned soup.
I have some paper.
I even have some cardboard rolls.
What type of things do you have at home?
So, we have to figure out, how are we going to build this bridge?
Hmm.
Now, I want you to imagine.
Take two minutes and just imagine and brainstorm some ideas on a piece of paper that you find at your house.
Think about which idea you're going to like best.
You can even draw some examples of bridges or any ideas that you come up with.
I did a lot of brainstorming.
Did you?
So, now let's pick our favorite idea that we came up with, and that's the one that we're going to go with for our building.
So, you might have thought of the different types of bridges you learned before or some of the different techniques that you can make at home.
And it's okay if your bridge looks different than mine.
Don't worry about that.
We all are going to try our own thing today.
So, now we're going to do Step 3, and that's to plan.
So I want you to take a few minutes and I want you to draw out your design.
You can label it with what materials you're going to use in your house.
And you can come up with different sketches and different pictures of what you want your bridge to look like and how you think you are going to make the best bridge to hold the most weight.
Let's get planning.
I did a lot of planning.
Did you?
Here's what I drew.
I'm going to build my bridge out of toilet-paper rolls, some cardboard, Popsicle sticks, and some paper.
And I'm going to see if they can hold up my weight.
I found a soup can and some jars filled with lots of coins, so I'm going to try to use that for my weight.
Now we're going to get to our fourth step, and that is to create.
So let's start building.
Remember, follow the plan that you made, and we're going to see how that works out.
Here we go.
Let's build together.
Here is my bridge.
Did you finish building?
Yours looks great!
Look at that.
So, going back, our problem was that we needed to make a bridge that can hold the most, weight, so we're going to test out our bridges soon.
But let's just review.
Here is my brainstorming and my ideas.
I drew a bridge with two piers and a deck in the middle.
So, here you go.
Here's what I came up with.
Did you follow your original plan?
I hope so.
Don't worry.
We're gonna have time to improve our design after.
So, let's test this out.
I found a couple things that I could test.
So, here is a small toy car that I have, so let's see if it can hold on my bridge.
Pretty good.
Test yours out.
Did it work?
If it didn't work, don't worry.
We're going to be able to improve and change our design, but for now, let's just see what happens.
Here's another car I have.
This one's a little bit bigger and heavier, so let's try something else.
Ooh!
It's holding the weight of this toy car up, but can you see how it's starting to bend my bridge?
If that was real life, would that be safe?
No, definitely not.
Would you want to go on a bridge that started to curve under?
I sure wouldn't.
So, if I'm going to put something heavier on this bridge, I'm going to need to fix it, because right now, it's not working so well.
Should I try something really heavy?
Do you have anything heavier that you can put on your bridge?
I've got this jar full of coins.
This is pretty heavy.
And I've got this really big can of beans, too.
Let's try the can and see.
Uh-oh.
That did not work too well.
I guess my bridge was able to hold the small toy car that was pretty light.
The medium-sized object -- eh, not too good.
It started to curve.
And now my can of beans -- definitely not.
Think about all the vehicles that go across a bridge in real life.
You've got people riding their bicycles.
You've got regular-sized cars.
You have big S.U.V.s.
Then you have big trucks and tractors that are filled with lots of stuff.
Those are really, really heavy.
So for bridges to be safe enough to have all of those cars and trucks on there at the same time, they need to really be sturdy.
Do you remember when we saw some real bridges?
We can think about those when we improve our design and see what is it we could change?
So, we learned about the different kind of bridges.
Maybe you can use some different materials at home and try to change up the way you designed your bridge or maybe you can try a different type of material to help hold your bridge.
So, what we're going to do now is, we're going to do our step number 5, and that's going to be to improve our design.
Remember when I talked about this step?
To me, this is of the most important steps.
I always tell my students to keep trying and keep improving.
Even when you think your bridge is the best it could be, you can make it better.
So even if you tested your bridge and, right now, it works great and it's holding up all the materials you have on it, I still want you to try to make it better.
There's got to be something you can change.
Otherwise, look around your house and grab something a little heavier.
Do you have a can of vegetables or beans or soup?
They were pretty heavy, so you can try something different this time.
So, let's take a couple minutes, and I want you to improve.
You can go back to your plan and you can see what you can do to make it different.
Try to come up with something a little different.
You don't have to start all the way from scratch, but maybe use the different materials or add something.
My bridge didn't work quite well with just the piece of paper, so I'm going to think about what other materials I could use that can maybe make it a little bit stronger.
And I want you to do the same.
So let's start brainstorming again, alright?
Here we go.
Did you finish brainstorming your new idea?
I did.
So, what I'm going to try this time -- because the paper fell in the middle of my two piers, I'm going to try to add a third pier in the middle of my bridge.
I think that might help the support in the middle.
I'm also going to add Popsicle sticks because they're so strong that I think this might help hold up any materials that are on it.
But I don't know.
We're gonna test it and find out.
So, I want you to take a few more minutes to redo your design.
Remember, even if it held something up, I still want you to try to improve it.
So try again and see if you can make it work better.
You can even get something heavier this time, but don't test it yet.
Just rebuild.
Here we go.
Alright, I finished building.
Did you?
I hope so, because now we're going to test our improved bridge to see if our new ideas worked.
So, as I was building, I realized that I kind of had a problem.
My plan to improve said to include a third pier in the middle of my bridge, but when I put it in, I was thinking, "If this bridge was in real life, maybe there's too much in the middle, because how would something like a boat go by?"
My bridge is not too wide, so putting this really takes up a lot of room.
So I decided to leave it out and see what happened.
So, I changed my bridge according to my plan.
I put my rolls on the side, like I had before.
I had the paper.
But this time, I added Popsicle sticks.
They're super-strong, so I'm hoping this is going to help hold up some more weight.
Are you ready to test your bridges out?
Alright, so, grab something that you used before.
You can start off with something light, and let's see how it goes.
So, here's my car.
Easy-peasy.
Is yours working?
Alright, let's see.
This is my medium-sized car.
I hope this works.
Yes.
It's not caving in anymore, so that's good.
My bridge seems a bit more sturdy.
How is yours holding up?
Do you see any indenting?
Is it caving in?
If it's not, that's a good sign.
And if your bridge doesn't work, don't worry.
Remember, we're gonna keep on trying.
Should I try the heavy cans?
Yeah?
Alright, here we go.
I'm kind of nervous, but I hope this works.
I got it!
Take a look at this.
It really did stand up.
My bridge is just like the one I built before, but this time, I added Popsicle sticks.
So this small improvement is really helping it.
Look how strong it looks.
The Popsicle sticks kind of stick together, and they're able to hold some support with my toilet-paper rolls.
How is yours working?
Is it standing up?
Can you try to put something even heavier on top this time?
See what else you can find.
Maybe I can add another can.
Should I?
Let's see.
It works.
I'm so excited.
Now, if your bridge didn't work, it's okay.
When we're done with this, you can keep on trying.
This is something that you can do over and over again.
Remember, engineers never give up.
They keep on trying and they think of new ideas and they think of new designs.
They don't just try something once and say, "Eh, I don't feel like doing it again."
They keep on going.
So, look at your plan and see how you can improve it, and you can try again, so don't worry.
What I always tell my students in class is to be super-thinkers and always think outside of the box.
No matter what you do, you can use the engineering design process.
Let's review our steps.
One, you always want to ask, "What is your problem?
What am I trying to solve or create?"
Two, we always want to imagine.
Think about, "What is it that I'm going to do?"
Brainstorm your ideas, research, look up things that have been done.
How can you change something or improve something?
And then, three, we're going to plan.
Always use planning time.
It's important to plan before you build so you have a better idea of what you're going to do.
Our fourth step is when we create and we got to do something fun and put things together.
And then our fifth step is, we always want to improve.
So no matter what you build or you invent or you create, you want to try over and over again.
I bet you know of a lot of famous basketball players, football players, singers, or actresses.
Do you think that they got on the baseball team the first time they tried out?
Do you think that they started selling out concerts?
No, definitely not.
They tried over and over again.
You can ask.
If you listen to any one of these famous stars or even someone that invented something, they kept on trying, they didn't give up, and they improved every time.
So even if, today, your bridge didn't work, you can still improve it.
You can still decide, "What is it that I'm going to do differently?
What is it that I'm going to change about my bridge?"
Okay, now, part of thinking and problem solving is to think what happens if you have something a little more challenging?
So, building a simple bridge might have felt a little bit easy today, but you can always make it harder.
So, let's pretend that our bridge needed to be between something that was uneven ground.
So if you have some books at home, you can grab them and make a pile or some kind of weight, something big that you can stack up.
And let's pretend that one side of our bridge is higher than the other.
What happens now if I have to make my bridge like this?
It's going to be a bit more tricky.
Do you want to go down a bridge like this driving your car?
I do not.
So try to figure out what you would do for this type of situation.
What could you do to get these to feel even if the ground is higher in one spot?
Because it happens often in different places.
Can you think of a solution?
I'll give you one minute.
Did you come up with an idea?
I know you came up with something.
Remember, no idea is a bad idea.
You can always try it, and if it doesn't work, then you can improve it and try something else.
Don't forget our design-process steps So, I came up with an idea.
I kind of sketched out some stuff here and I was thinking, if the ground is higher on one side and my rolls are so high, but it's lower on the other, maybe I could cut it to make it even, and I can have them both be the same size so that no one goes down a really steep slope, because I don't think that my cans would hold up here.
It wouldn't work.
This is just gonna go flying off.
So, let's try.
If I measure this, I can take my pencil or ruler and I can kind of say, "Right here is where I think I need to cut this."
So, let's try one.
If you're having trouble, you might want to ask an adult to help you cut.
Let's see.
I can tape my pencil on top to see if it's even.
Looks pretty good.
So, let me make sure I mark the other one.
And I'm going to cut this.
What do you think?
Let me try to build my bridge from before that was pretty strong.
So, here is my paper.
Then let's get my Popsicle sticks ready.
Are you building yours?
Keep on going.
I've got all my Popsicle sticks ready to go.
And let's test it out.
My small car is good.
Remember, this one was pretty light.
Let's see what happens when I add this bigger one.
Alright, not too bad.
Should I try the can again?
This was the really heavy one.
It works.
Does yours work?
Should we double up again?
I'm sure yours is good and you are thinking.
I see so many super-thinkers out there.
So, even if you have something challenging like this, you can still use the design process to help you through.
So, as you go through the rest of today and the week, I want you to think about the design process.
The engineering design process can be so helpful to you no matter what your problem is.
You can use it to solve all sorts of issues.
So, remember the steps and always go through them so that you can figure anything out.
I want to say hi to my Hazlet family and everyone, and I miss all of my students so much.
I am so grateful that you spent the hour with me.
I hope you had fun building.
You did such a great job.
I'm sure you miss your teachers and they miss you, and I hope that we are all back in school soon.
I wish you and your families a wonderful week ahead, and I hope you stay healthy at home.
Bye!
♪♪


Support for PBS provided by:
NJTV Learning Live is a local public television program presented by NJ PBS